
Best Debugging Tools to Buy in July 2026

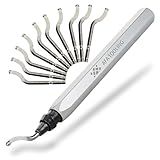
Deburring Tool with 12 High Speed Steel Blades, Deburring Tool 3D Printing, Deburring Tool for Metal, Resin, Copper, Plastic, PVC Pipes, 3D Printed Edges (1 Silver Handle)
- VERSATILE TOOL: 12 SPARE BLADES FOR EVERY DEBURRING NEED.
- SMOOTH FINISHES: SHARP CUTTER REMOVES BURRS QUICKLY AND EASILY.
- DURABLE DESIGN: PREMIUM METAL AND NON-SLIP HANDLE FOR LONG USE.


Deburring Tool with 12 High Speed Steel Blades, Deburring Tool 3D Printing, Deburring Tool for Metal, Resin, Copper, Plastic, PVC Pipes, 3D Printed Edges (1 Blue Handle)
- VERSATILE BLADES: 12 INTERCHANGEABLE BLADES FOR DIVERSE APPLICATIONS.
- FAST & SMOOTH RESULTS: SHARP HEAD ENSURES QUICK, EVEN DEBURRING.
- DURABLE DESIGN: PREMIUM MATERIALS FOR LONG-LASTING, EFFICIENT USE.
AFA Tooling - Deburring Tool Micro-Polished & Anodized Handle with 11 High-Speed Steel M2 Blades, Deburring Tool 3D Printing, Reamer Tool for Metal, PVC, Copper Pipe, Plastic, Resin & 3D Printed Edges
-
11 HEAVY-DUTY S-BLADES INCLUDED FOR LONG-LASTING USE!
-
VERSATILE TOOL FOR BRASS, STEEL, PVC & 3D PRINTED EDGES!
-
DURABLE HSS STEEL BLADES: 80% LONGER LASTING PERFORMANCE!

Coeweule Premium Deburring Tool with 15 Pcs High Speed Steel Swivel Blades, Deburring Tool for Metal, Resin, PVC Pipes, Plastic, Aluminum, Copper, Wood, 3D Printing Burr Removal Reamer Tool Red
- EFFORTLESS BLADE REPLACEMENT WITH 15 SPARES FOR SMOOTH RESULTS.
- 360° ROTATING TIP FOR FLEXIBLE USE ON ANY WORKPIECE SHAPE.
- DURABLE ALUMINUM HANDLE AND SHARP STEEL BLADES FOR LASTING PERFORMANCE.

Deburring Tool with 12 High Speed Steel Blades, Deburring Tool 3D Printing, Deburring Tool for Metal, Resin, Copper, Plastic, PVC Pipes, 3D Printed Edges (1 Black Handle)
-
VERSATILE KIT: INCLUDES 12 BLADES FOR ALL YOUR DEBURRING NEEDS.
-
QUICK & SMOOTH: SHARP CUTTER HEAD ENSURES EFFICIENT SURFACE FINISHING.
-
USER-FRIENDLY DESIGN: EASY BLADE CHANGE AND 360° COVERAGE FOR DEBURRING.

VASTOOLS Deburring Tool for 3D Printer,18pcs,10pc Multiuse Blades Removing Burr,6Pcs Needle File,Micro Wire Cutter for 3D Print, Plastic Models
- VERSATILE DEBURRING TOOL FOR METALS, PLASTICS, AND 3D PRINTING.
- INCLUDES 6 DURABLE NEEDLE FILES FOR PRECISE FINISHING TASKS.
- FLUSH-CUT CUTTER DESIGN ENSURES CLEAN CUTS ON SOFT WIRES.

iMBAPrice - RJ45 Network Cable Tester for Lan Phone RJ45/RJ11/RJ12/CAT5/CAT6/CAT7 UTP Wire Test Tool
- AUTO-RUN TESTS FOR CONTINUITY, SHORTS, AND CROSSED WIRES!
- VISIBLE LED DISPLAY FOR EASY STATUS MONITORING.
- COMPATIBLE WITH ALL RJ11 & RJ45 CABLE TYPES!

Acrux7 Hand Deburring Tool Kit, 10pcs Rotary Deburr Blades + 1pcs Countersink Blade with Aluminum and Silicone Handle, Great Burr Remover Hand Tool for Wood, Plastic, Aluminum, Copper and Steel
- VERSATILE 47MM HSS BLADES CUT PLASTIC & SOFT METALS WITH EASE.
- ERGONOMIC HANDLES ENSURE COMFORT FOR LONG-TERM USE AND FOCUS.
- QUICK BLADE INSTALLATION WITH 360° ROTATION FOR PRECISION WORK.

Visual Studio Code: End-to-End Editing and Debugging Tools for Web Developers
In a Mocha testing environment, the process.stdout.write can sometimes behave differently or not work as expected compared to regular Node.js environment. This is because Mocha captures the stdout output for its own reporting purposes.
One way to make process.stdout.write work in a Mocha environment is to use a library or plugin that allows you to override the stdout behavior. One popular library that can help in this scenario is mocha-stdio.
By using mocha-stdio, you can redirect the stdout output to a custom stream or function, which can help in capturing the stdout messages that you want to test. This can be especially useful when writing tests for functions that rely on process.stdout.write for logging or output.
Alternatively, you can also use spies or mocks provided by testing libraries such as Sinon.js to intercept and test the stdout output in your Mocha tests. Sinon.js provides functions like spy and stub that can help you simulate the behavior of process.stdout.write and assert on the output that is written to stdout.
Overall, by using the right tools and techniques, you can make process.stdout.write work effectively in a Mocha testing environment and ensure that your tests capture and verify the expected output.
What is the limitation of process.stdout.write in mocha compared to other methods?
One limitation of process.stdout.write in Mocha compared to other methods is that it can only be used to write output to the standard output stream. This means that the output written using process.stdout.write will be displayed in the console where Mocha is running, but it cannot be captured or manipulated programmatically. Other methods, such as using the console.log function or writing output to a file, provide more flexibility in terms of capturing and processing output.
How to debug issues with process.stdout.write in mocha tests?
To debug issues with process.stdout.write in Mocha tests, you can try the following steps:
- Check if the process.stdout.write is being called correctly in your test code. Make sure that you are passing the correct arguments to process.stdout.write and that it is being triggered at the right time.
- Add console.log statements before and after the process.stdout.write call to see if it is being reached during the execution of the test.
- Verify if the output from process.stdout.write is being redirected somewhere else, such as a file or a different output stream. Make sure that the output is being captured and displayed correctly.
- Use the --inspect-brk flag when running your Mocha tests to enable the Node.js debugger. You can then set breakpoints in your code to analyze the behavior of process.stdout.write during the test execution.
- Consider using a different method for capturing and handling output in your tests, such as using a custom logger or a testing library that provides better support for handling output.
By following these steps, you should be able to identify and debug any issues related to process.stdout.write in your Mocha tests.
How to configure process.stdout.write in a mocha environment?
In a Mocha environment, you can configure process.stdout.write to control where the output is sent. Here are two common ways to configure process.stdout.write in a Mocha environment:
- Use mocha.opts file: Create a mocha.opts file in the root directory of your Mocha project and add the following line to redirect the output to a file:
--reporter json --reporter-options output=output.log
This will configure Mocha to use the json reporter and output the results to a file named output.log.
- Use a custom reporter: You can also create a custom reporter to customize the output of Mocha tests. Here's an example of a custom reporter that logs the output to a file:
const fs = require('fs');
function CustomReporter(runner) { runner.on('end', function() { let output = ''; runner.suite.eachTest(test => { output += `${test.fullTitle()}: ${test.state}\n`; }); fs.writeFileSync('output.log', output); }); }
module.exports = CustomReporter;
You can then use this custom reporter by passing the path to the reporter module using the --reporter option when running Mocha:
mocha test/**/*.js --reporter ./custom-reporter.js
These are just a couple of ways to configure process.stdout.write in a Mocha environment. Depending on your specific requirements, you may need to explore other options or customizations.