
Best Debugging Tools for Node.js/Mocha Tests to Buy in July 2026
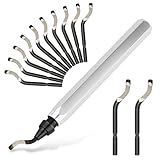
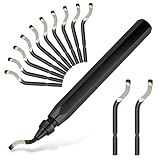
Deburring Tool with 12 High Speed Steel Blades, Deburring Tool 3D Printing, Deburring Tool for Metal, Resin, Copper, Plastic, PVC Pipes, 3D Printed Edges (1 Silver Handle)
-
VERSATILE USE: WORKS ON METAL, RESIN, PLASTIC & MORE FOR ANY PROJECT!
-
QUICK BLADE CHANGE: EFFORTLESS SWAPPING WITH 12 SPARE BLADES INCLUDED.
-
DURABLE DESIGN: PREMIUM MATERIALS ENSURE LONG-LASTING, EFFICIENT PERFORMANCE.


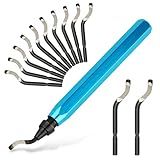
Deburring Tool with 12 High Speed Steel Blades, Deburring Tool 3D Printing, Deburring Tool for Metal, Resin, Copper, Plastic, PVC Pipes, 3D Printed Edges (1 Blue Handle)
- VERSATILE BLADES: 12 INTERCHANGEABLE BLADES FOR DIVERSE WORKPIECES.
- SMOOTH FINISHES: RAPID BURR REMOVAL FOR PROFESSIONAL-QUALITY SURFACES.
- USER-FRIENDLY DESIGN: QUICK BLADE INSTALLATION AND 360° COVERAGE.
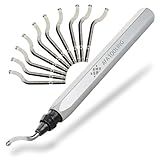
AFA Tooling - Deburring Tool Micro-Polished & Anodized Handle with 11 High-Speed Steel M2 Blades, Deburring Tool 3D Printing, Reamer Tool for Metal, PVC, Copper Pipe, Plastic, Resin & 3D Printed Edges
-
11 HEAVY-DUTY BLADES: EXTRA PACK ENSURES LONGEVITY AND PERFORMANCE.
-
VERSATILE FOR MULTIPLE MATERIALS: IDEAL FOR PLUMBERS, DIYERS & PROS.
-
DURABLE HSS STEEL: 80% LONGER LASTING BLADES FOR SUPERIOR CUTTING POWER.
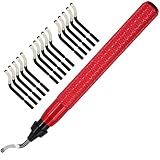
Coeweule Premium Deburring Tool with 15 Pcs High Speed Steel Swivel Blades, Deburring Tool for Metal, Resin, PVC Pipes, Plastic, Aluminum, Copper, Wood, 3D Printing Burr Removal Reamer Tool Red
- 15 REPLACEABLE BLADES FOR VERSATILE, LONG-LASTING USE
- 360° ROTATING BLADE FOR EFFORTLESS WORK ON ANY SHAPE
- ERGONOMIC NON-SLIP HANDLE FOR COMFORT AND SAFETY
Deburring Tool with 12 High Speed Steel Blades, Deburring Tool 3D Printing, Deburring Tool for Metal, Resin, Copper, Plastic, PVC Pipes, 3D Printed Edges (1 Black Handle)
-
VERSATILE BLADES: 12 INTERCHANGEABLE BLADES SUIT VARIOUS MATERIALS EASILY.
-
USER-FRIENDLY DESIGN: QUICK-MOUNT BLADES & 360° COVERAGE FOR EFFICIENCY.
-
DURABLE & EFFICIENT: PREMIUM METAL ENSURES LONG-LASTING, SMOOTH DEBURRING.

VASTOOLS Deburring Tool for 3D Printer,18pcs,10pc Multiuse Blades Removing Burr,6Pcs Needle File,Micro Wire Cutter for 3D Print, Plastic Models
- VERSATILE TOOL FOR DEBURRING 3D PRINTS, METAL, AND PLASTIC SURFACES.
- COMPLETE NEEDLE FILE SET FOR PRECISION FINISHING IN VARIOUS PROJECTS.
- EFFICIENT FLUSH-CUT CUTTER FOR CLEAN CUTS ON SOFT WIRE AND MATERIALS.
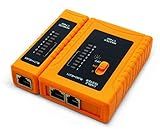
iMBAPrice - RJ45 Network Cable Tester for Lan Phone RJ45/RJ11/RJ12/CAT5/CAT6/CAT7 UTP Wire Test Tool
- AUTO-RUN TESTS FOR CONTINUITY, SHORT/CROSSED WIRE DETECTION.
- VISIBLE LED DISPLAY FOR INSTANT STATUS UPDATES.
- COMPATIBLE WITH RJ11, RJ45, AND MULTIPLE ETHERNET TYPES.
To debug a Node.js/Mocha test built with a Makefile, you can use the Node.js debugger by adding the --inspect flag to the node command in your Makefile. This will start the Node.js debugger on a specified port. You can then connect to the debugger using a Chrome DevTools or any other debugging client that supports the Chrome DevTools Protocol.
Alternatively, you can use the --inspect-brk flag to start the debugger in a paused state, allowing you to set breakpoints in your code before it runs.
You can also use the --inspect flag with the Mocha test runner in your Makefile to debug a specific test or suite of tests. This will allow you to step through your tests and troubleshoot any issues that may arise.
In addition to using the Node.js debugger, you can also use console.log statements within your test code to output debug information to the console.
By leveraging these debugging techniques, you can effectively troubleshoot and debug your Node.js/Mocha tests that are built with a Makefile.
How to handle exceptions in node.js/mocha tests when debugging?
When handling exceptions in Node.js/mocha tests during debugging, you can use try/catch blocks to catch and handle any errors that may occur. Below are some steps to handle exceptions in node.js/mocha tests when debugging:
- Use try/catch blocks: Wrap the code that you suspect may throw an exception inside a try block and catch any exceptions that might be thrown inside the catch block. This allows you to handle the exceptions gracefully without crashing the test or the application.
it('should throw an exception', () => { try { // code that may throw an exception } catch (error) { console.error(`An exception occurred: ${error}`); } });
- Use chai's expect().to.throw() assertion: If you are using the Chai assertion library in your tests, you can use the expect().to.throw() assertion to check if a specific function throws an exception.
it('should throw an exception', () => { expect(() => { // code that may throw an exception }).to.throw(); });
- Use async/await and try/catch: If you are dealing with asynchronous code in your tests, you can use async/await with try/catch blocks to handle exceptions.
it('should throw an exception', async () => { try { await someAsyncFunction(); } catch (error) { console.error(`An exception occurred: ${error}`); } });
- Enable debugging and logging: To get more insights into the exception that occurred, you can enable debugging and logging in your Node.js/mocha tests. You can use console.log() statements to log relevant information before and after the code that may throw an exception to help you identify the root cause of the issue.
it('should throw an exception', () => { console.log('Before the code that may throw an exception'); // code that may throw an exception console.log('After the code that may throw an exception'); });
By following these steps and best practices, you can effectively handle exceptions in your node.js/mocha tests during debugging and ensure that your tests are robust and reliable.
What tools can be used for profiling and performance monitoring in node.js/mocha tests?
There are several tools that can be used for profiling and performance monitoring in Node.js/mocha tests:
- Node.js built-in profiler: Node.js includes a built-in profiling tool that can be used to profile the performance of your application. You can enable the profiler by passing the --inspect flag when running your Node.js application, and then use tools like Chrome DevTools or the V8 inspector to analyze the profiling data.
- Chrome DevTools: Chrome DevTools provides a variety of profiling tools that can be used to analyze the performance of your Node.js application. You can use tools like the Performance tab to analyze CPU and memory usage, as well as the JavaScript profiler to identify performance bottlenecks in your code.
- Heapdump: Heapdump is a tool that can be used to take snapshots of the V8 heap in a Node.js application. These snapshots can be analyzed to identify memory leaks and optimize memory usage in your application.
- New Relic: New Relic is a performance monitoring tool that can be used to monitor the performance of your Node.js application in real-time. It provides insights into CPU and memory usage, as well as detailed performance metrics that can help you identify bottlenecks in your code.
- Clinic.js: Clinic.js is a suite of tools developed by NearForm that can be used for profiling and performance monitoring in Node.js applications. It includes tools like Clinic Doctor for diagnosing performance issues, Clinic Bubbleprof for visualizing CPU profiles, and Clinic Flame for visualizing flame graphs of CPU usage.
These are just a few examples of the tools that can be used for profiling and performance monitoring in Node.js/mocha tests. Each tool has its own strengths and weaknesses, so it's important to choose the tool that best fits your specific needs and use case.
What are common pitfalls to avoid when debugging node.js/mocha tests with makefile?
- Not setting up proper dependencies in the makefile: Make sure that your makefile includes all the necessary dependencies for running your tests with mocha. If any dependencies are missing, your tests may not run correctly.
- Using incorrect paths in the makefile: Make sure that you are using the correct paths in your makefile to locate your node.js and mocha binaries. If the paths are incorrect, your tests may fail to run.
- Not properly setting up the test scripts in the makefile: Make sure that your makefile includes the correct scripts for running your tests with mocha. If the scripts are incorrect or missing, your tests will not run as expected.
- Failing to set up environment variables: If your tests require certain environment variables to run correctly, make sure that you are setting them up properly in your makefile. Failing to do so can lead to unexpected failures in your tests.
- Ignoring error messages: When debugging your tests, make sure to pay attention to any error messages that are displayed. These can provide valuable information about what went wrong and help you troubleshoot more effectively.
- Not cleaning up after failed tests: If a test fails, make sure to clean up any temporary files or resources that were created during the test. Failing to do so can lead to issues in subsequent test runs.
- Neglecting to update the makefile when making changes to your code: If you make changes to your code that affect how your tests are run, make sure to update your makefile accordingly. Failing to do so can result in tests not running properly or failing unexpectedly.
How to use breakpoints in debugging node.js/mocha tests?
To use breakpoints in debugging Node.js/Mocha tests, you can use the built-in debugger feature in Node.js. Follow these steps:
- Add a "debugger" statement to your test case where you want to set a breakpoint. For example:
it('should do something', () => { debugger; // test code here });
- Run your Mocha test with the Node.js debugger enabled. You can do this by running the following command:
node inspect ./node_modules/mocha/bin/_mocha your_test_file.js
This command will start the Node.js debugger and pause at the first line of your test file.
- Once the debugger is running, you can use the following commands to control the execution flow:
- c or continue: Continue executing the program until the next breakpoint is hit.
- n or next: Step over to the next line of code.
- s or step: Step into the next function.
- repl: Enter a read-eval-print loop to inspect variables and execute code.
- list(n): List n lines of source code around the current breakpoint location.
- You can set additional breakpoints by adding more "debugger" statements to your code and running the debugger again.
- Once you have finished debugging, you can exit the debugger by pressing Ctrl + C twice.
By following these steps, you can effectively use breakpoints to debug your Node.js/Mocha tests and identify and fix any issues in your code.
How to troubleshoot errors in node.js/mocha tests using makefile?
To troubleshoot errors in Node.js/Mocha tests using a makefile, you can follow these steps:
- Make sure that your makefile is set up properly to run your test scripts. Check that the test target in your makefile is configured correctly to run the Mocha tests.
- Run the makefile to execute the tests by running make test in your terminal. If there are any errors, the output will show which tests are failing and what the error messages are. This can help you identify the specific issues in your code.
- Look at the error messages to understand what is going wrong in your tests. Check for syntax errors, assertion failures, or other issues in your code that are causing the tests to fail.
- Debug your tests by adding console.log statements or using a debugger to step through your code. This can help you pinpoint where the problem is occurring and troubleshoot it more effectively.
- Make sure that your dependencies are properly installed and up-to-date. Sometimes errors can occur due to missing or outdated dependencies.
- Consider using tools like eslint or mocha --inspect flag to help identify errors and debug your tests more efficiently.
By following these steps and using your makefile effectively, you should be able to troubleshoot errors in your Node.js/Mocha tests and resolve them in a timely manner.